Pet Rock Plushie
This is for anyone who loves the idea of pet rocks but also loves soft things. I made this pattern for fun and thought others might enjoy it, too - who among us can resist putting a cute, little face on inanimate objects?? Probably some, but I bet it’s a minority.
The pattern is free here on my website, and there is also a PDF version on my Etsy for $1.60, if for some reason you want or need it in that format. (The shop name is also Clarion Eyrie.)
I added moss to mine, but I have also been thinking about other possibilities as I have edited the pattern - you could add arms and legs (simple chains with a little bobble on the ends, then slip stitch back up), you could play around with colored yarns to try to make your pet rock look like a gemstone, you could add poly pellets or a rock near the end of stuffing the plushie and turn it into a soft paperweight…so many possibilities! I would love to see your variations, in the comments here or you could tag me on Instagram or Facebook.
If you’re ready for a new pal, let’s rock and roll!
Supplies:
Scissors
5 mm hook
Gray weight 5 yarn (I used Premier Parfait Chunky)
Optional green yarns for moss details
Stitch marker
Yarn needle
Two plastic safety eyes with backs (I used 14 mm)
black yarn for face details
*Note: You can use whatever yarn size you like, plus a correspondingly appropriate hook size for the yarn and your tension.
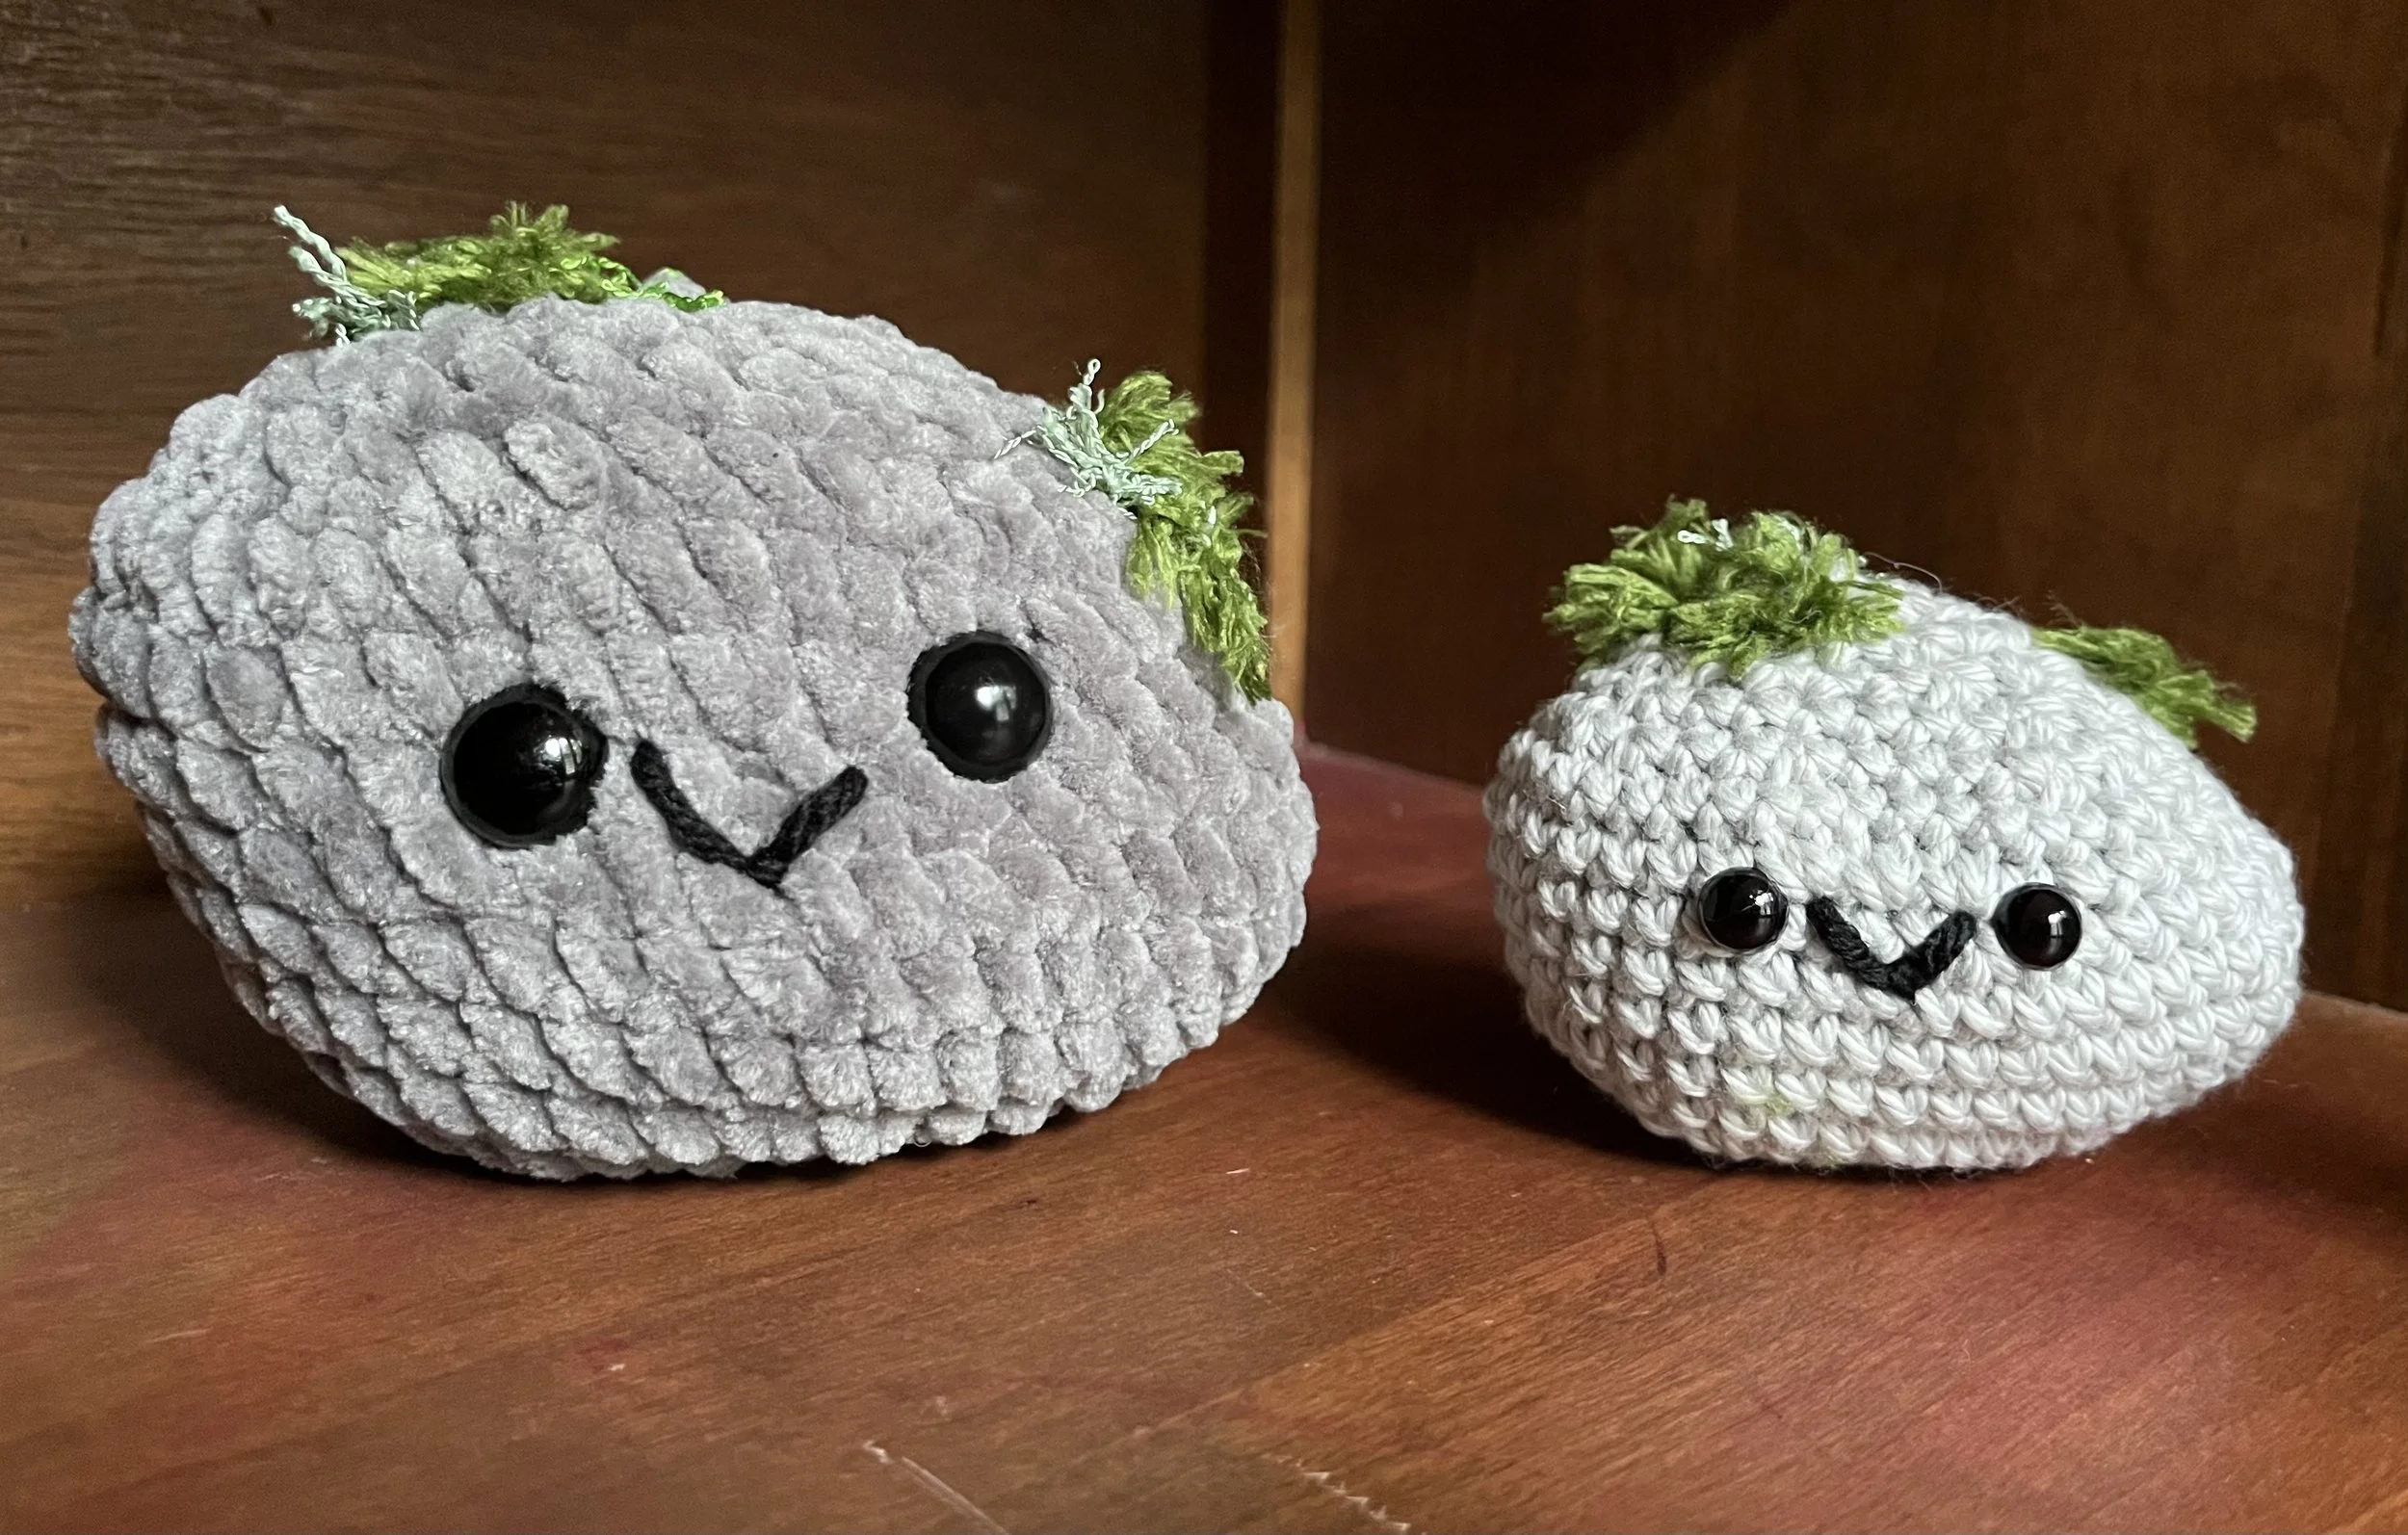
See the difference yarn and hook sizes make!
For the larger Pet Rock, I used the materials in the Supplies list. For the smaller Pet Rock, I used a weight 4 cotton yarn, a 3 mm hook, and 10 mm safety eyes (I think).
Abbreviations used in this pattern:
ch = chain
sc = single crochet
inc = increase
dec = decrease
FO = fasten off
Additional notes:
*We will use invisible increases and decreases, shortened to inc and dec for simplicity.
*You will need to be able to work into both sides of the starting chain.
Pattern:
*I have listed the total number of stitches in each round at the end in parentheses.
Body
Chain 9
R1: Starting in second chain from hook,
sc 8, then inc into end of chain, sc 8 on other side of chain, inc into other end of chain (20)
R2: Inc, 5 sc, 2inc, 2 sc, 2 inc, 6 sc, 2 inc (27)
R3: 2 inc, 3 sc, 2 inc, 6sc, 3 inc, 6 sc, 2 inc, 2 sc, 1 inc (37)
R4: 2 inc, 16 sc, 2 inc, 17 sc (41)
R5 - 6: sc around (41) (two rows)
R7: 3 dec, 4 sc, 2 dec, 6 sc, 2 inc, 5 sc, 2 dec, 10 sc (36)
R8: 2 dec, 4 sc, 3 inc, 5 sc, 2 inc, 18 sc (39)
R9: sc around (39)
R10: 3 sc, 2 dec, 4 sc, 1 dec, 2sc, 3 dec, 4 sc, 1 dec, 6 sc, 2 dec, 2 sc (30)
R11: 3 dec, 6 sc, 1 dec, 3 sc, 2 dec, 4 sc, 2 dec, 1 sc (22)
*insert plastic safety eyes between rows 7 and 8, 3-4 stitches between them
Begin stuffing
R12: 1 sc, 2 dec, 3 sc, 3 dec, 1 sc, 2 dec, 3 sc (15)
R13: 2 sc, 2 dec, 2 sc, 3 dec, 1 sc (10)
Continue Stuffing
R14: 5 dec
FO, sew closed
Add moss if you would like by taking strands of green yarn (each a few inches long), foleding the strands in half, using your hook to pull the looped end halfway through stitches in your plushie, pulling the loose ends of each strand through the loop, and tying a couple knots in each strand of green yarn. Trim the long ends to the length you like. Make patches of moss by placing multiple green yarn strands near each other.
Sewing mouth on the body:
Insert needle into side of the face, where you will tie off at the end.
Bring needle out below the right eye.
Insert needle under the left eye.
Bring needle out in the row below the mouth, equally distant from each end of the mouth.
Bring needle around the mouth yarn and reinsert needle in the same spot below the mouth to tie the bottom of the mouth.
Pull to draw mouth down into a smile, adjust how you like.
Insert needle into the space the yarn is coming out of, then push needle out where the first yarn end is coming out. Tie into a knot and use the needle to pull both ends out in the same spot. Cut short and use needle to push little ends into the plushie.
Please feel free to sell items you make with this pattern and add a pattern credit for Clarion Eyrie. Thank you!
I hope you enjoy your new Rock friend!!